Unit testing is a software testing method where the individual units/ components of a software are tested to verify that each unit works as expected.
This guide will walk through creating a project with Vue CLI 3, using testing solutions, writing and running test cases while creating a basic single page application. It would be helpful to get the source code from the GitHub repository while following this post.
Link for the repo: https://github.com/adityaekawade/Vue.js-unit-test-with-jest
Concept of the app
This will be a basic weather app where the user can enter a zip code and get the current temperature in that region. We will be breaking it down into individual component and write test cases for each component as we go on building it.

The app will be using the openweathermap API to make a http request to get the data. Api docs: https://openweathermap.org/current
Vue CLI 3 Installation
I will be using Vue CLI 3, as it is easier to use testing with Vue CLI 3. It also includes vue-test-utils which is a great library that makes testing a lot easier in vue. It also provides the hot reloading which speeds up the development process.
To install Vue CLI
npm install -g @vue/cli
To create a new project
vue create unit-test-project
Once we hit this, it will ask for some information. Choose Manually select features and enable “Unit testing” along with other required features and continue. I have also selected a CSS pre-processor (Sass/ SCSS).
Next, it will ask to select a “Unit testing solution”. Select “Jest” here. It will then ask to either save the configuration in package.json or in the default config file and also if you want to save this configuration as a preset.
Next, navigate to the project folder and start the app:
cd unit-test-project
npm run serve
This builds the project, and you should be able to launch it on localhost:8080.
The project structure is as follows:
- Component files are present in
src/componentsdirectory. Eg:HelloWorld.vue - Test files are present in
test/unitdirectory. Eg:example.spec.js
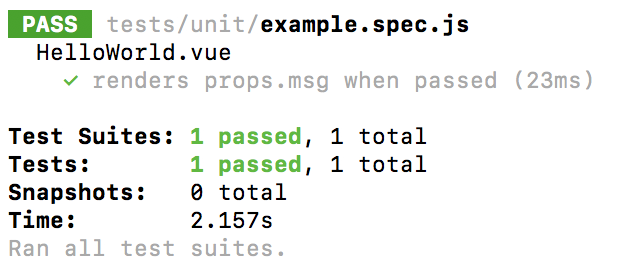
The example.spec.js file is the default test that comes with vue cli 3. It expects the text on the HelloWorld component to match the data received as props from its parent App.vue.
import { shallowMount } from '@vue/test-utils'

import HelloWorld from '@/components/HelloWorld.vue'

describe('HelloWorld.vue', () => {
	it('renders props.msg when passed', () => {
	const msg = 'new message'
	const wrapper = shallowMount(HelloWorld, {
	propsData: { msg }
  })
	expect(wrapper.text()).toMatch(msg)
 })
})
Each test file will have describe() and it().
describe()is usually the name of the component you are testing- Each
it()is a different test case.
wrapper: A Wrapper is an object that contains a mounted component or vnode and methods to test the component or vnode.
shallowMount( ): It creates a wrapper that contains the mounted and rendered vue component. But it only mounts the one component. Here only HelloWorld component is mounted. There is another type mount( ), which does similar thing but it would also mount the child components.
To run the test from the command line:
npm run test:unit
It will run the unit tests and you should be able to see the following result:
Setting up for the existing project:
Ref: https://vue-test-utils.vuejs.org/guides/testing-single-file-components-with-jest.html
Vue UI
Vue cli 3 also comes with a project management user interface which can be used to install dependencies/ plugins, to serve the app as well as run the tests.
To start the Vue UI
vue ui
This will open up the Vue UI tool. You can import the newly created project.
To serve the project go to Tasks > serve and click Run Task. Once compiled you can open the app by clicking Open app.
Installing Vuetify plugin
I will install the Vuetify plugin, since this project will use Vuetify, a material design component framework.
Go to Plugins in the Vue UI, click Add plugin and search for vuetify.
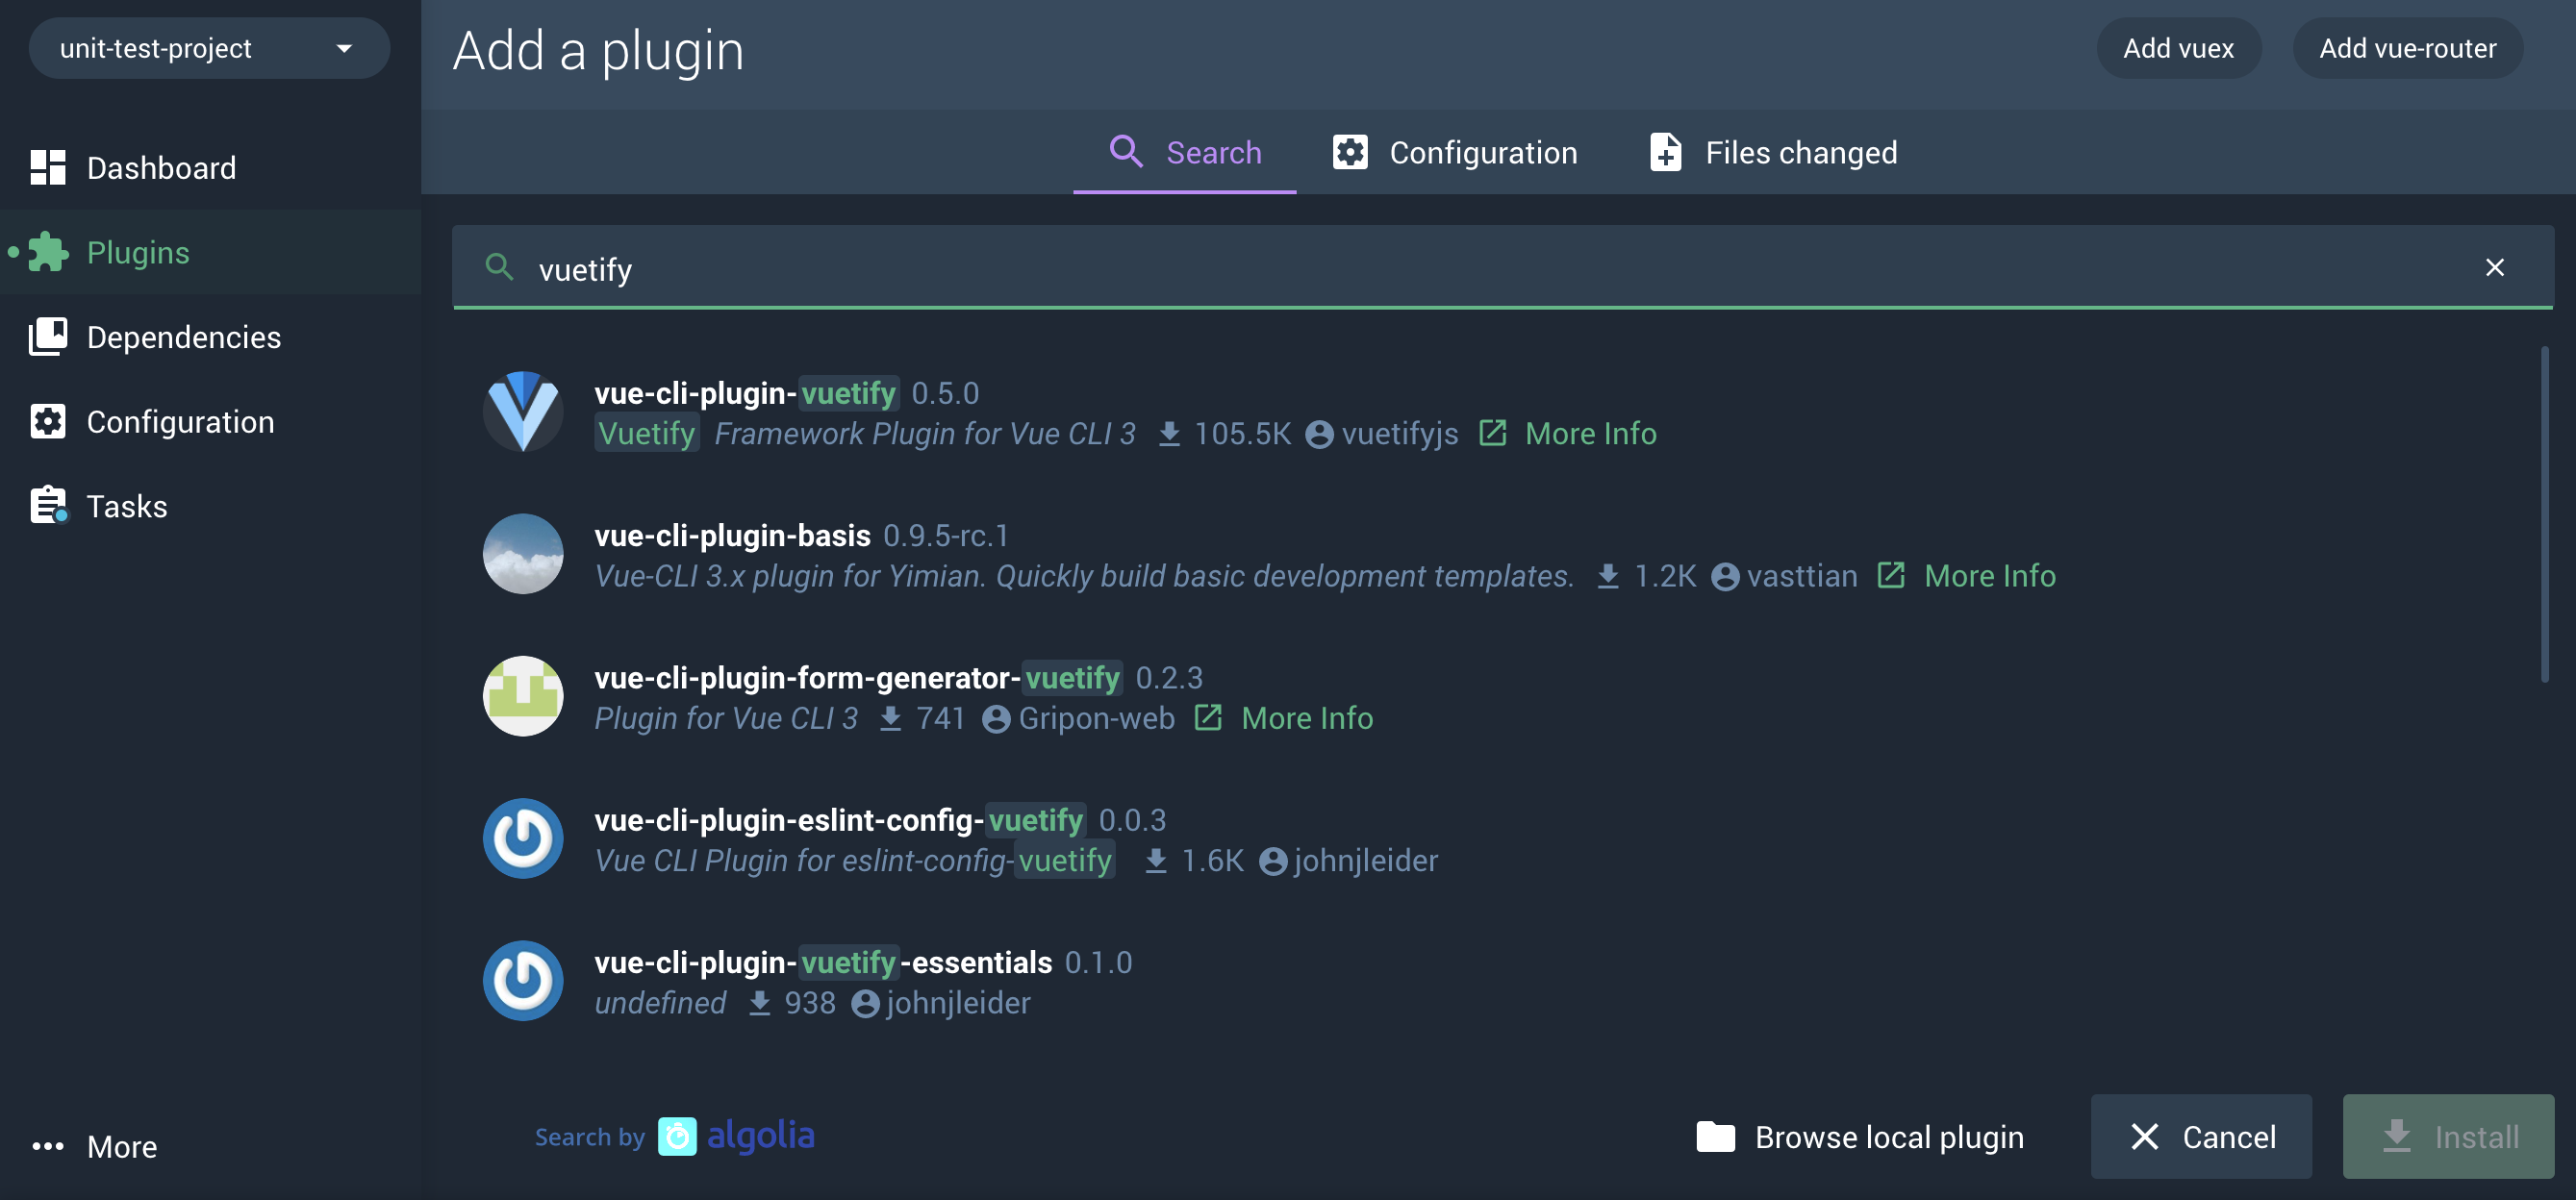
Select the first option and click install.
It will then ask to choose a preset. You can keep the Default and finish the installation.
If you visit the app you should be able to see the landing page is now updated with vuetify desing and content. The unit test would fail since the app content is changed.
Component Structure
The following images show the structure of the components of the app. Here ZipCodeInput and DisplayTemperature are the child components of the Home. ZipCodeInput takes the input (zip code) and DisplayTemperature shows the output (temperature).

Writing Unit Tests!
You can write unit tests before you write your code, after you write your code or while you write your code.
Before we get started, this Stack Exchange thread provides a great reading material about writing unit test and while following the Test Driven Development (TDD) approach.
So, I have cleaned the files by renaming the HelloWorld.vue file to Home.vue and removing all its content. Also, I have deleted the default example.spec.js test file.
To start with, I will create a test file named Home.spec.js file in the tests directory which will have the test cases for the <Home> component. It follows a convention to create a test file with the name COMPONENT_NAME.spec.js and placing it under tests/unit directory.
I would want to test the following:
- If the
Homecomponent is an instance of Vue - This component has the text “Weather App” which would be set as a data property.
- The text “Weather App” would be a heading 2 text. So, I will test to
check if the component contains an
h2tag.
The test code will look as follows:
//tests/unit/Home.spec.js

import { createLocalVue, mount, shallowMount } from '@vue/test-utils'
import Home from '@/components/Home.vue'
import vuetify from "vuetify"

describe('Home.vue', () => {
  let wrapper;
  let title = 'Weather App'
  beforeEach(()=>{
    const localVue = createLocalVue()
    localVue.use(vuetify)

    wrapper = shallowMount(Home, {
      localVue
    });
  })
  it('renders a vue instance', () => {
     expect(shallowMount(Home).isVueInstance()).toBe(true);
   });

  it('Checks the data-title', () => {
    expect(wrapper.vm.title).toMatch('Weather App')
  })

  it('has an h2', ()=>{
    expect(wrapper.contains('h2')).toBe(true)
  })
})
createLocalVue() allows adding components, mixins, installed plugins (Eg. Vuetify) without polluting the global vue class.
Running these tests would show the following results:
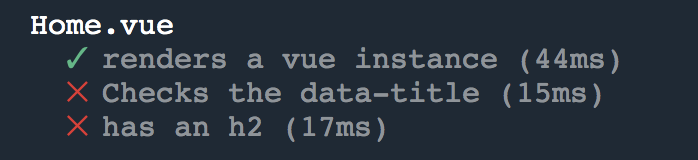
Next, we will write the code to pass the two failed tests.
//Home.vue

<template>
  <v-container>
    <v-flex xs12>
      <h2></h2>
     </v-flex>
  </v-container>
</template>

<script>
  export default {
    data: () => ({
      title: "Weather App",
    })
  }
</script>
This will pass the two failed tests.

However, you might also notice the following console error:
console.error node_modules/vuetify/dist/vuetify.js:25204

[Vuetify] Multiple instances of Vue detected

See https://github.com/vuetifyjs/vuetify/issues/4068
There seems to be an issue with Vuetify that causes multiple instances of vue when mounted with localVue. You can overcome this problem by not using the localVue.
The test would then look like:
import { createLocalVue, mount, shallowMount } from '@vue/test-utils'
import Home from '@/components/Home.vue'
import vuetify from "vuetify"
import Vue from 'vue';

describe('Home.vue', () => {
  let wrapper;
  let title = 'Weather App'
  beforeEach(()=>{
    Vue.use(vuetify);
    wrapper = shallowMount(Home);
  })
  it('renders a vue instance', () => {
    expect(shallowMount(Home).isVueInstance()).toBe(true);
  });
})
But since the documentation recommends using localVue, I will continue with localVue.
Creating child components
I will create two files ZipCodeInput.vue, DisplayTemperature.vue and import them in Home.vue as its child components. As mentioned earlier the ZipCodeInput.vue will be taking the input from the user and DisplayTemperature.vue will be displaying the output
Once imported I will check if the Home component contains the child component. The test case would look like:
//Home.spec.js
import ZipCodeInput from '@/components/ZipCodeInput.vue'
…
…
…
it('check if child ZipCodeInput exists', ()=>{
expect(wrapper.contains(ZipCodeInput)).toBe(true);
})
Creating ZipCodeInput.vue
As planned earlier (Refer to the image in Component Structure section above ), this component should have the following:
- An input field where the user can enter the zip code.
- A button to submit the input.
The test file would for this behavior would look like:
//tests/ ZipCodeInput.spec.js

import { createLocalVue, mount } from '@vue/test-utils'
import ZipCodeInput from '@/components/ZipCodeInput.vue'
import vuetify from "vuetify"

describe('ZipCodeInput', () => {
  let wrapper;
  beforeEach(()=>{
    const localVue = createLocalVue()
    localVue.use(vuetify)

    wrapper = mount(ZipCodeInput, {
      localVue,
    })
  })

  it('Find input- type text ', ()=>{
    expect(wrapper.contains('[data-test="zipCodeText"]')).toBe(true)
  })
  it('has a button', ()=>{
    expect(wrapper.contains('button')).toBe(true)
  })
})
The data-testis a custom data attribute. It works as a custom selector instead of using the class, id, or tag.
Writing the code to pass these test
//ZipCodeInput.vue

<template>
  <div>
    <v-text-field
      type="input"
      single-line
      placeholder="Enter US Zip code"
      data-test="zipCodeText"
      v-model="inputText"
    ></v-text-field>
    <v-btn v-on:click="save" data-test="saveButton" color="primary">Enter</v-btn>
    <br>
  </div>
</template>

<script>
export default {
  props: {
  },
  data () {
    return {
      inputText: "",
    }
  },
  methods: {
  }
}
</script>
Once we have added the elements to our component we can proceed to add the functionality. We can write the test cases for the following user stories of this component:
- User enter the text in the input (The test case should find the input box and enter the text. The value of the input binds with the data property
inputText) - User clicks the ENTER button.
- Once the ENTER button is clicked, the input should be cleared.
- Check the emitted event
  it('Enter text and check the value of inputText', ()=>{
    var textInput = wrapper.find('[data-test="zipCodeText"]')
    textInput.setValue('84102');
    expect(wrapper.vm.inputText).toBe('84102')
  })

  it('click enter button and clear input', ()=>{
    wrapper.find('button').trigger("click");
    var textInput = wrapper.find('[data-test="zipCodeText"]')
    expect(textInput.text()).toMatch('')
    expect(wrapper.vm.inputText).toBe('')
  })

  it('Check emitted "save" event', ()=>{
    wrapper.vm.$emit('save', "84102");
    expect(wrapper.emitted().save).toBeTruthy()
  })
vm is the vue instance. You can access all the instance methods and properties of a vm with wrapper.vm.
Create a save() method in the ZipCodeInput.vue to save the input and emit the custom event back to its parent.
    save(){
      this.$emit('save', this.inputText)
      this.inputText = "";
    }
Handling the emitted event
The event emitted from the ZipCodeInput.vue should be handled in its parent component <Home> inorder to process and get the data for the input provided.
Update Home.vue
<ZipCodeInput
  v-on:save="processZipCode($event)"
/>
Testing the emitted custom event:
//Home.specs.js

it('test event emitted from ZipCodeInput', ()=>{
  wrapper.find(ZipCodeInput).vm.$emit('save');
  expect(wrapper.find(ZipCodeInput).emitted().save).toBeTruthy()
})
Add processZipCode(code) in Home.vue to handle the emitted event. This method will call a function to fetch the data from the API. Also add fahrenheitTemperature and city as data properties.
//Home.vue

...
<script>
  import Model from './Model';
  var model = new Model();
...
...
  methods: {
      processZipCode(code){
        var data = model.fetchResponse(window.fetch, code);
        data.then(res=>{
          let kelvinTemp = res.main.temp;
          this.FahrenheitConverter(kelvinTemp);
          this.city = res.name;
        })
      },
    },
  data: () => ({
    title: "Weather App",
    fahrenheitTemperature: null,
    city: "",
  })
...
...
</script>
I am writing the function fetchResponse() in a Model.js file. This will be calling the API to fetch the data.
//Model.js

export default class Model {
  fetchResponse(fetch, zipCode){
    return fetch(`https://api.openweathermap.org/data/2.5/weather?zip=${zipCode},us&appid=YOURAPICODE`)
            .then(response => response.json())
            .then(data => data)
  }
}
Testing asynchronous AJAX requests
There are two ways of writing test cases for asynchronous AJAX requests:
- Dependency injection
- Mocking modules
Both work in a similar way by creating fake modules to test the data. This would allow us to test AJAX requests faster and not make requests to the API for every test call. If we are making calls to API for every test case, it would make the process extremely slow.
For example, if we are using an API for payment system, we cannot make payments every time to test the API. Mocking the API requests helps to overcome this issue.
Using dependency injection:
I have injected fetch as the dependency for the function fetchResponse(). The Fetch API provides an interface for fetching resources.
Next, I have written a basic test to check if the API’s URL is called correctly by creating a fake implementation of the Fetch API response. In this test case, I have injected the dependency which is fakeFetch.
//tests/unit/Model.spec.js
import Model from '@/components/Model';
var model = new Model();

it("calls fetch with correct url", ()=>{
  const fakeFetch = url =>{
    expect(url).toBe("https://api.openweathermap.org/data/2.5/weather?zip=84102,us&appid=YOURAPICODE")
    return new Promise(function(resolve){
    })
  }
  model.fetchResponse(fakeFetch, "84102")
})
Adding the dependency allows to make the code more testable. Without the dependency the test would not have any control over how fetchResponse() calls fetch api. The fakeFetch created here mimics the behavior of how the actual fetch would respond.
Since we will not be calling the real API, we will also create a fake data which would be the resulting JSON response. You can get this data by actually calling the API.
//Model.spec.js

const fakeData = {
  "coord": {
  "lon": -111.89,
  "lat": 40.77
  },
  "weather": [
  {
  "id": 804,
  "main": "Clouds",
  "description": "overcast clouds",
  "icon": "04n"
  }
  ],
  "base": "stations",
  "main": {
  "temp": 271.34,
  "pressure": 1025,
  "humidity": 84,
  "temp_min": 270.45,
  "temp_max": 272.15
  },
  "visibility": 11265,
  "wind": {
  "speed": 3.1,
  "deg": 250
  },
  "clouds": {
  "all": 90
  },
  "dt": 1547345700,
  "sys": {
  "type": 1,
  "id": 5859,
  "message": 0.0042,
  "country": "US",
  "sunrise": 1547391022,
  "sunset": 1547425350
  },
  "id": 420037357,
  "name": "Salt Lake City",
  "cod": 200
}

//Test case
it("Check city name from the respponse", (done)=>{
  const fakeFetch = url => {
    return Promise.resolve({
      json: () => Promise.resolve(fakeData)
    })
  }
  model.fetchResponse(fakeFetch, "84102")
    .then(result => {
      expect(result.name).toBe("Salt Lake City")
    })
    done();
})
Ref: https://www.youtube.com/watch?v=0X1Ns2NRfks&t=1122s
Mocking modules
Lets assume that method processZipCode(zipcode) calls model.requestResponse(zipcode) instead of model.fetchResponse(fetch, zipcode)
//Model.js

import request from './request';

requestResponse(zipCode){
  return request(zipCode);
}
//request.js

export default function request(zipCode){
  return fetch(`https://api.openweathermap.org/data/2.5/weather?zip=${zipCode},us&appid=YOURAPICODE`)
          .then(response => response.json())
          .then(data => data)
}
Now in order to mock the function request(), we need to create a __mocks__ directory in the same directory where the request.js file is present. And then create a new request.js file inside the newly created directory which will have the mocked function.
//__mocks__/request.js

export default function request(url){
  return Promise.resolve(fakeData)
}

//fakeData is same as defined in the dependency injection example
Test the function requestResponse() in model.spec.js.
We also need to declare jest.mock(), to let jest know about the mocked function.
//Model.spec.js

jest.mock('@/components/request');

it('test mock module', () => {
  return model.requestResponse("84102")
    .then(result => {
      expect(result.name).toBe("Salt Lake City")
    })
});
Ref: https://jestjs.io/docs/en/manual-mocks
We are using the following two properties from the response received. City name and the temperature, which are saved as the data property city and fahrenheitTemperature in the <Home> component respectively.
However, the temperature received is in Kelvin and we need to convert it Fahrenheit.
Test for Kelvin- Fahrenheit conversion:
describe("Kelvin to Fahrenheit converter", function() {
 it("should convert Kelvin temperature to Farenhit", function() {
   expect(model.convertToFahrenhite(270)).toBe(26);
 })
})
Code for Kelvin- Fahrenheit conversion:
 convertToFahrenheit(kelvinTemp){
   return (Math.round((kelvinTemp-273.15)*1.8)+32)
 }
Creating DisplayTemperature.vue
Both the city name and Fahrenheit temperature are passed from <Home> to its child component <DisplayTemperature>.
//Home.vue

<DisplayTemperature
  :city="city"
  :fahrenheitTemperature="fahrenheitTemperature"
/>
`
- Test the props
- Test if the alert exists. (The temperature is displayed in an alert component. )
- Check the output
//tests/unit/DisplayTemperature.spec.js

import { createLocalVue, shallowMount } from '@vue/test-utils'
import DisplayTemperature from '@/components/DisplayTemperature.vue'
import vuetify from "vuetify"

describe('DisplayTemperature', () => {
  let wrapper;
  let city = "Salt Lake City"
  let fahrenheitTemperature = 39
  beforeEach(()=>{
    const localVue = createLocalVue()
    localVue.use(vuetify)

    wrapper = shallowMount(DisplayTemperature, {
      localVue,
      propsData:{
        city,
        fahrenheitTemperature
      }
    })
  })

  it('has a alert element', ()=>{
    expect(wrapper.contains('[data-test="alertElement"]')).toBe(true)
  })

  it('check props', ()=>{
    expect(wrapper.vm.city).toBe('Salt Lake City')
  })

  it('check the output', ()=>{
    expect(wrapper.text()).toMatch(`The current temperature in ${city} is ${fahrenheitTemperature} F.`)
  })

});
Create the component and run the test cases again
//DisplayTemperature.vue

<template>
  <div>
    <v-alert data-test="alertElement" type="success" :value="true" outline>
      The current temperature in  is  F.
    </v-alert>
  </div>
</template>

<script>

export default {
  props: {
    city: {
      type: String
    },
    fahrenheitTemperature: {
      type: Number
    }
  },
}
</script>
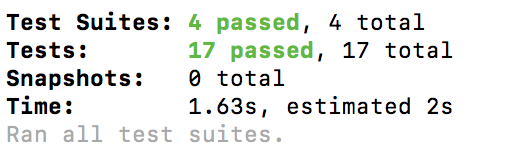
Running the test cases should show a similar result:
These are just some of the examples to get started with unit testing. Both vue-test-utils and Jest have documentation which is precise and clear to understand. Also the unit tests can serve as a type of documentation for the app. The it() statements can describe exactly what each unit of the individual component is doing!
Summarizing the steps for writing tests:
- Import the component in the .spec.js file
- Import the required methods from vue-test-utils
- Import Vuetify
- Create a localVue instance with Vuetify.
- Mount the component
References:
vue-test-utils: https://vue-test-utils.vuejs.org/
Jest: https://jestjs.io/docs/en/getting-started
Test Driven Development: what it is, and what it is not
JavaScript Testing - Mocking Async Code