General use
The gene.iobio version 2 blog series marches on with a discussion of bookmarks. A future post in this series will talk about importing bookmarks from external tools, e.g. Gemini. In this post, I will demonstrate how to use bookmarks, beginning with the RAI1 usecase. In this gene, we can see a variant that is associated with smith-magenis syndrome and is marked as pathogenic in ClinVar (this is the variant at the far left in the ranking table and marked with the  symbol). If we click on the variant (either clicking the column in the ranking table, or clicking on the actual variant in the proband variants), details about the variant will appear in a mouseover and in the panel to the left of the screen as shown below:
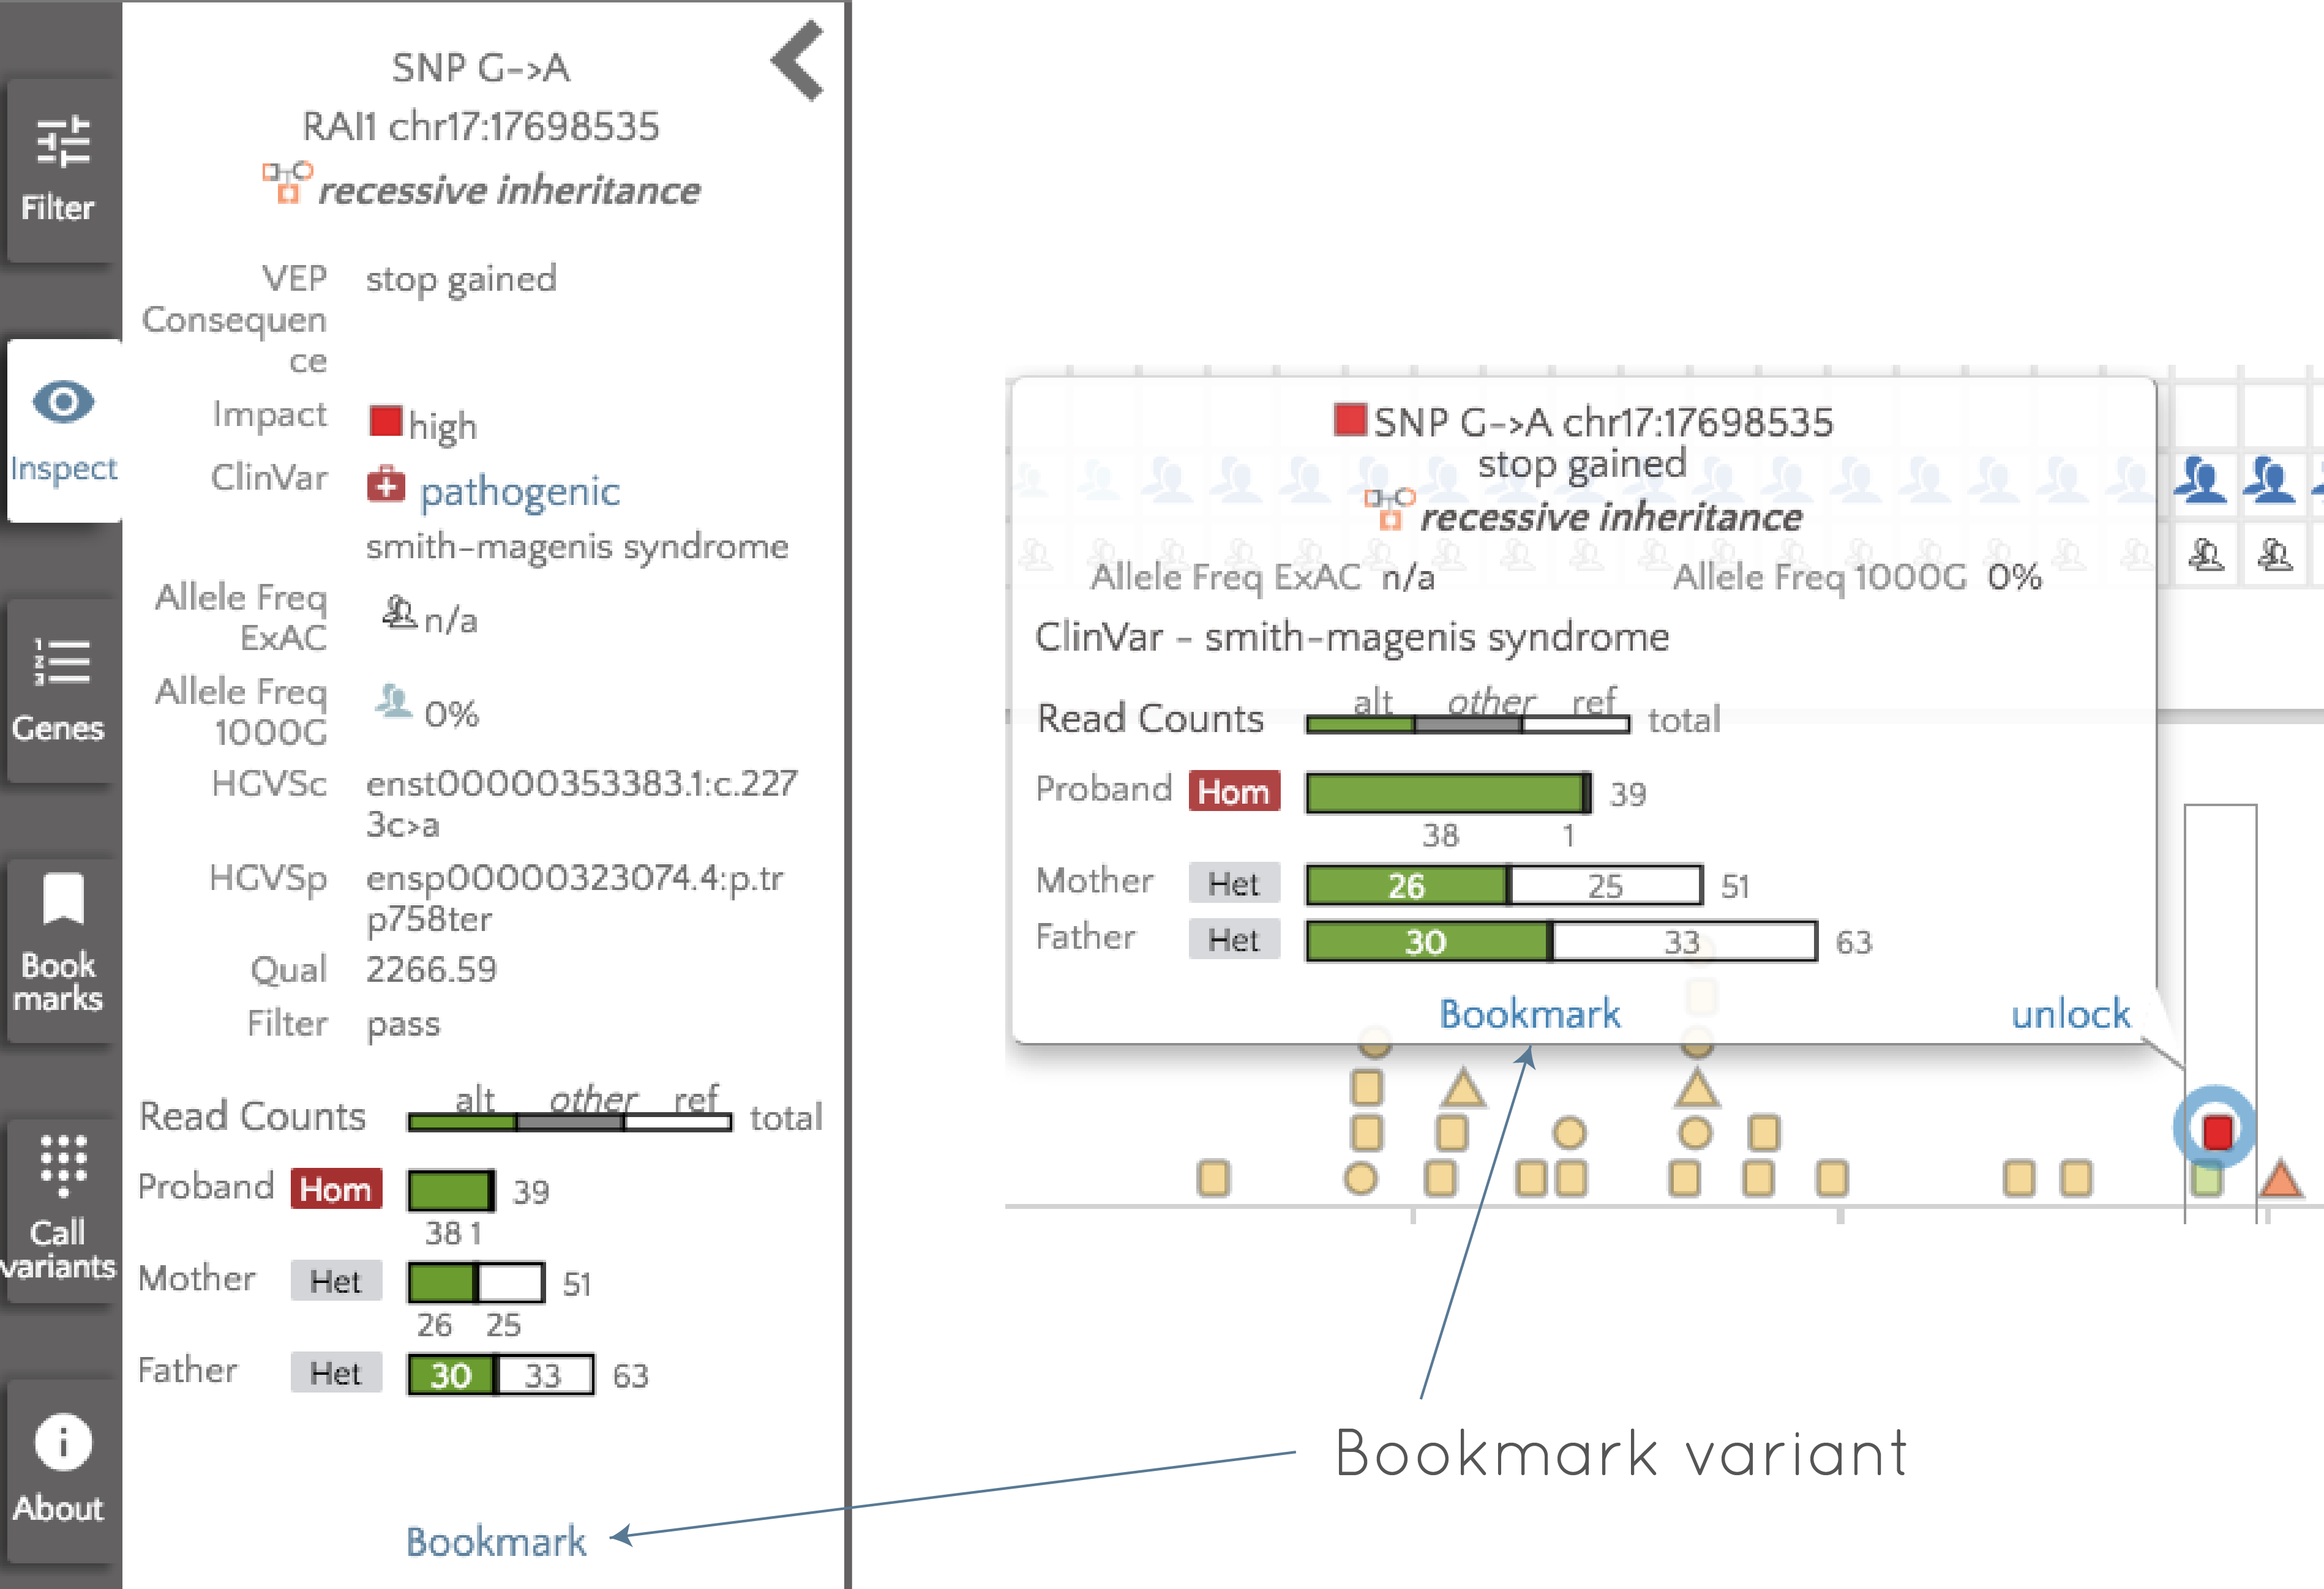
We can "bookmark" this variant by clicking "Bookmark" in either the left panel, or in the tooltip. Once bookmarked, we are free to continue looking at other variants, or analyzing other genes, knowing that we can easily return to this variant if needed. To return to the variant, we will use the "Bookmarks" panel to the left of the screen. If we open the bookmarks panel, we see the following at the left of the screen:
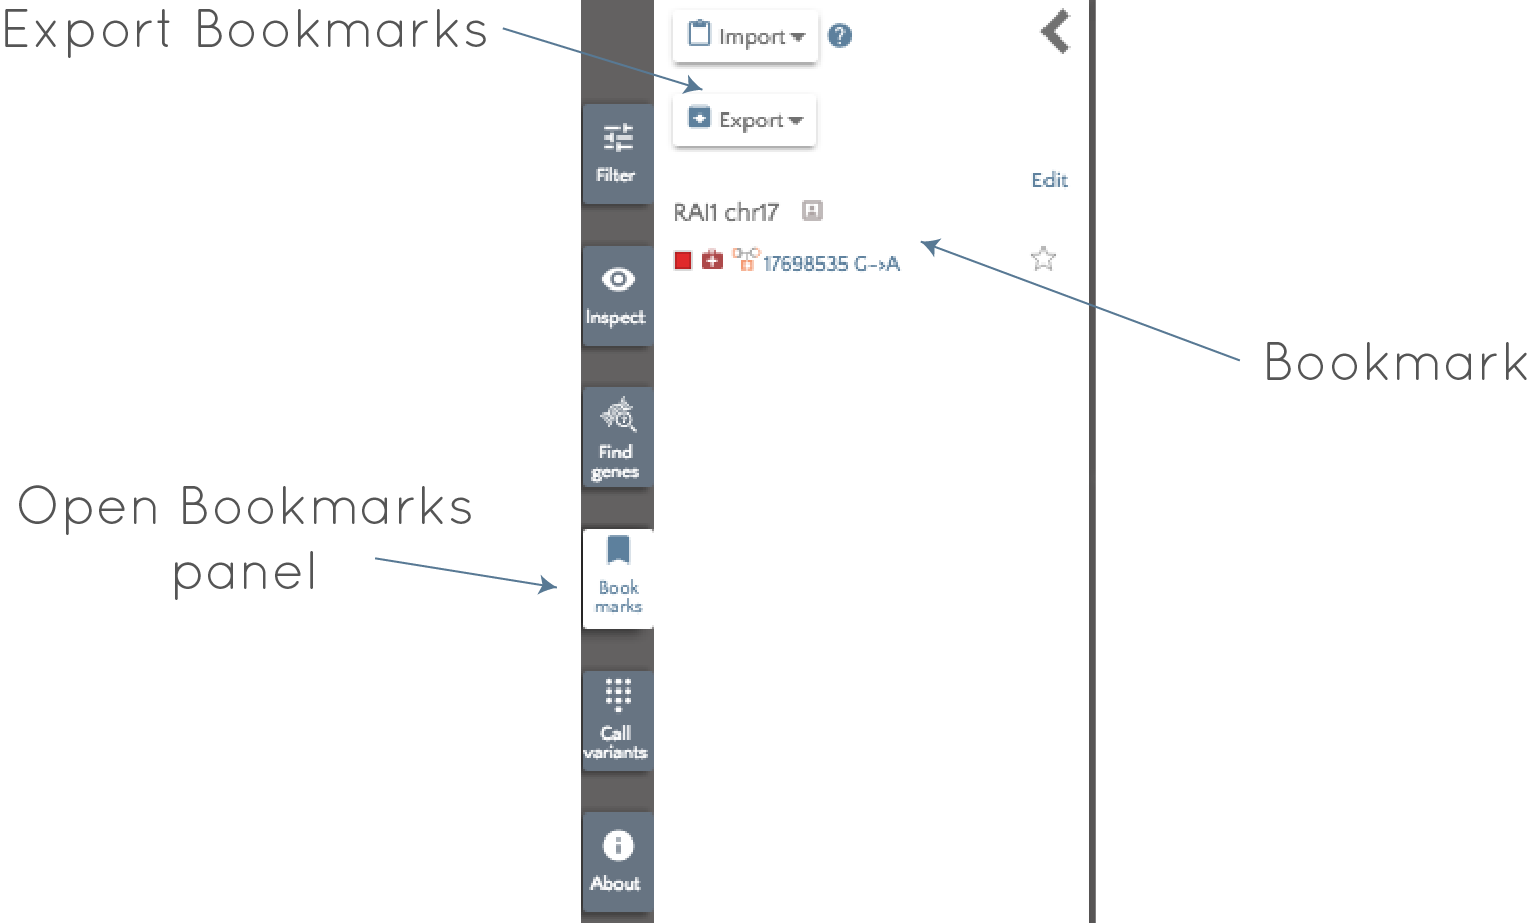
The glyphs associated with the variant are visible along with the gene, coordinate and alleles, so we can quickly identify the important attributes of the variant (see here for an explanation of the glyphs) - in this case a "high impact", ClinVar pathogenic, recessive variant. Clicking on the variant will return us to the correct gene and highlight the variant. All bookmarked variants will have the  glyph in the ranked variants table, and the glyph will appear in the gene badge at the top of the page - if multiple genes are open - (
![]() ), so you will always know which genes contain bookmarked variants.
), so you will always know which genes contain bookmarked variants.
Editing and exporting bookmarks
From the "Bookmarks" panel at the left, bookmarks can be:
- Selected; this will load the gene containing that variant and highlight the bookmarked variant,
- Starred, allowing important variants to be identified among all the bookmarked variants,
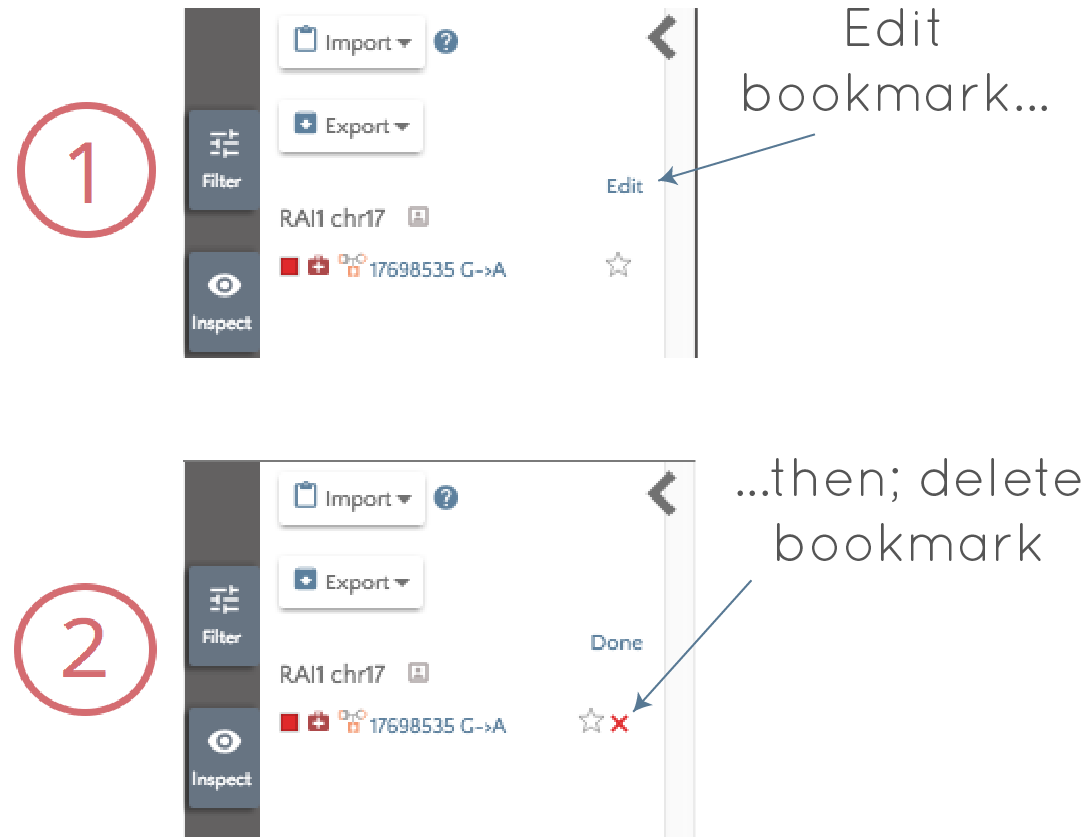
- Removed by clicking edit and then the red cross that appears next to the bookmark.
- Imported, which will be discussed in a later blog post,
- Exported. When we've finished analysis with gene.iobio, click on the "Export" button and we are given the option of exporting all variants, or just those that are starred. Choosing one of these options then opens a new tab, containing a text output of all the variants. This output includes not only positional information, but the ref and alt alleles, inheritance mode and gene. This file can then be saved, and can be imported back into gene.iobio at a later date.